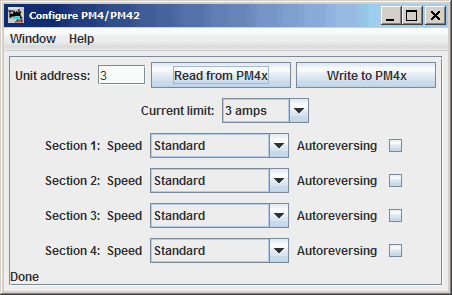
Configure Digitrax PM4x
The JMRI PM4x programming tool lets you configure the internal options of a PM4 or PM42 directly from your computer.
To open this tool from the JMRI start page select the LocoNet tab then find the tool on the drop down list.
To use it, you put the address of a PM4x board in the text field and click "Read from PM4x". The tool will read back the current state of the various options, and set the check boxes to correspond to their current values.
You can then, if you wish, change the checkboxes and click "Write to PM4x" to make your changes permanent.
The tool relies upon each PM4x board to have a unique "Board ID" (Board Address) in order to configure each device individually. While it is possible to change the Board ID number using JMRI, it cannot be done using this tool due to limitations of the PM4x design. Instead, follow the instructions found here, but you must consult the appropriate PM4x manual and modify the JMRI-based process to suit the PM4x device's buttons, button press time, and lamp flashes.
Limitations
- This tool is able to access PM4x boards with addresses between 1 and 256. Users are advised to avoid using the factory default board address (board address 1) as it will be difficult to program new boards with unique data if any in-service board is using the factory default board address.
- Because of the way the PM4x board works, this tool can't change the basic address of the unit. The PM4x documentation describes how to change the board address. It is possible to change the Board ID number using JMRI by following the instructions found here. Note that it is necessary to consult the appropriate PM4x manual and modify the JMRI-based process shown at the link above to suit the PM4x's buttons, button press time, and lamp flashes.
See Also
Documentation for the PM4 and PM42 can be found at the Digitrax Web Site.