# ESP32-C3 Development Board


[](https://discord.gg/PtnaAaQMpS)
The ESP32 C3 Nano is an Arduino Nano compatible development board, designed to provide enhanced computing power, wireless connectivity, addressable LED capabilities, and a built-in programming and debugging interface.
It is based on the ESP32 C3 chip, which provides improved processing capabilities, increased memory, and wireless connectivity compared to traditional Atmega variant.
The board maintains compatibility with the Arduino Nano form factor, ensuring easy integration into existing projects and making it a drop-in replacement for the traditional Arduino Nano board.

## Features
- [ESP32-C3](https://www.espressif.com/en/products/socs/esp32-c3) 32-bit RISC-V MCU in a 32-pin package
- Up to 160 MHz CPU clock
- 4 MB Flash
- 400 KB SRAM
- WiFi and BLE
- Native USB for flashing and debugging
- Onboard 3V3 LDO (disconnected for low power applications)
- Flash using Arduino IDE, Platformio, or the IDE of your choice
- One RGB LED (WS2812B)
- RESET button
## ESP32-C3
ESP32-C3 is an entry-level 32-bit MCU in the ESP32 line. Generally they offer similar feature set compared to other ESP32 chips, but designed to be low-cost from the start, including popular communication interfaces, low power consumption in sleep mode (down to few micro-amps) and ease of use.
| | ESP8266 | ESP32 | ESP32-C3 | ESP32-S2 | ESP32-S3 |
|---------------|----------|------------|------------|------------|------------|
| Cores | 1x L106 | 2x LX6 | 1x RISC-V | 1x LX7 | 2x LX7
| Max Frequency | 160 Mhz | 240 Mhz | 160 Mhz | 240 Mhz | 240 Mhz
| Flash | External 1 MB (Typical)| External Up to 16 MB | Internal 4 MB or External | Internal 4 MB or External | Internal 8 MB or External
| SRAM Total | 160 KB | 320 KB | 400 KB | 320 KB | 520 KB
| SRAM Usable | 80 KB | 160 KB | 160 KB | 180 KB | 225 KB
| PSRAM | NA | External 4 MB | NA | Internal 2 MB or Ext | Internal 2 MB or 8 MB or Ext
| GPIO count | 11 Usable| 34 Total | 22 Total | 43 Total | 45 Total
| Connectivity | WiFi | WiFi + BT | WiFi + BLE | WiFi | WiFi + BLE
| USB | No | No | Yes + JTAG | Yes | Yes + JTAG
| UART | 1+ | 3 | 2 | 2 | 3
| I2C | 1 | 2 | 1 | 2 | 2
| SPI | 1 | 4 | 3 | 4 | 4
| I2S | 1 | 2 | 1 | 1 | 2
| LCD | No | No | No | No | Yes
## Board Pinout

## MCU Pinout

## How to programm
To program the ESP32-C3 microcontroller, you may use either Serial upload method or USB Upload. ESP32-C3 Development Board uses USB Upload method.
You need to connect USB-C cable, it will be used to power the board, flash over USB, serial over USB and JTAG over USB
### Arduino IDE
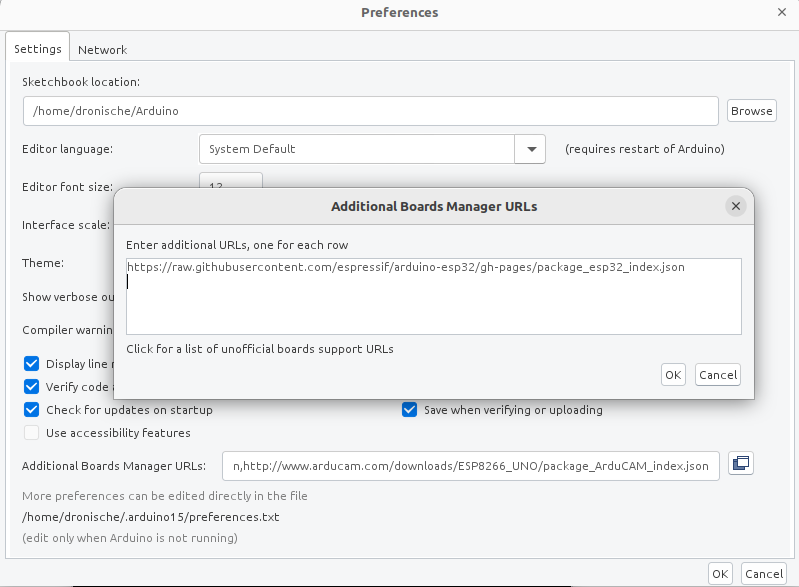
Add [https://raw.githubusercontent.com/espressif/arduino-esp32/gh-pages/package_esp32_index.json](https://raw.githubusercontent.com/espressif/arduino-esp32/gh-pages/package_esp32_index.json) to the board manager
After that you should install **ESP32 by Espressif Systems** from Board Manager

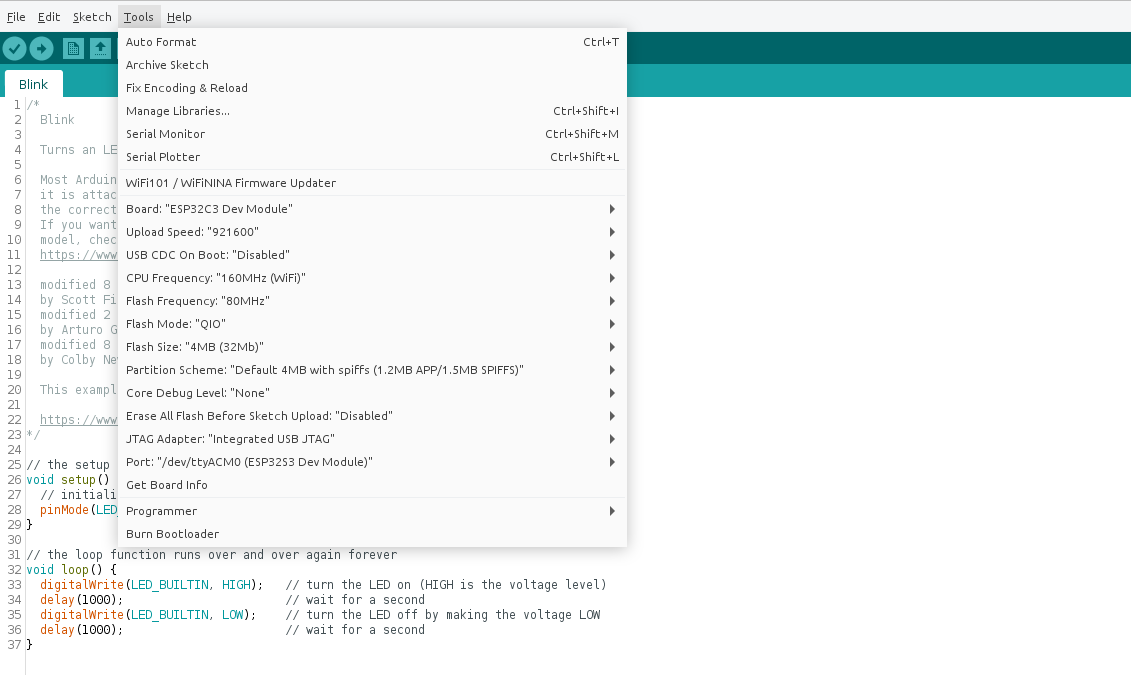
Select **ESP32 C3 Dev Board** as target and other necessary settings in the board settings after
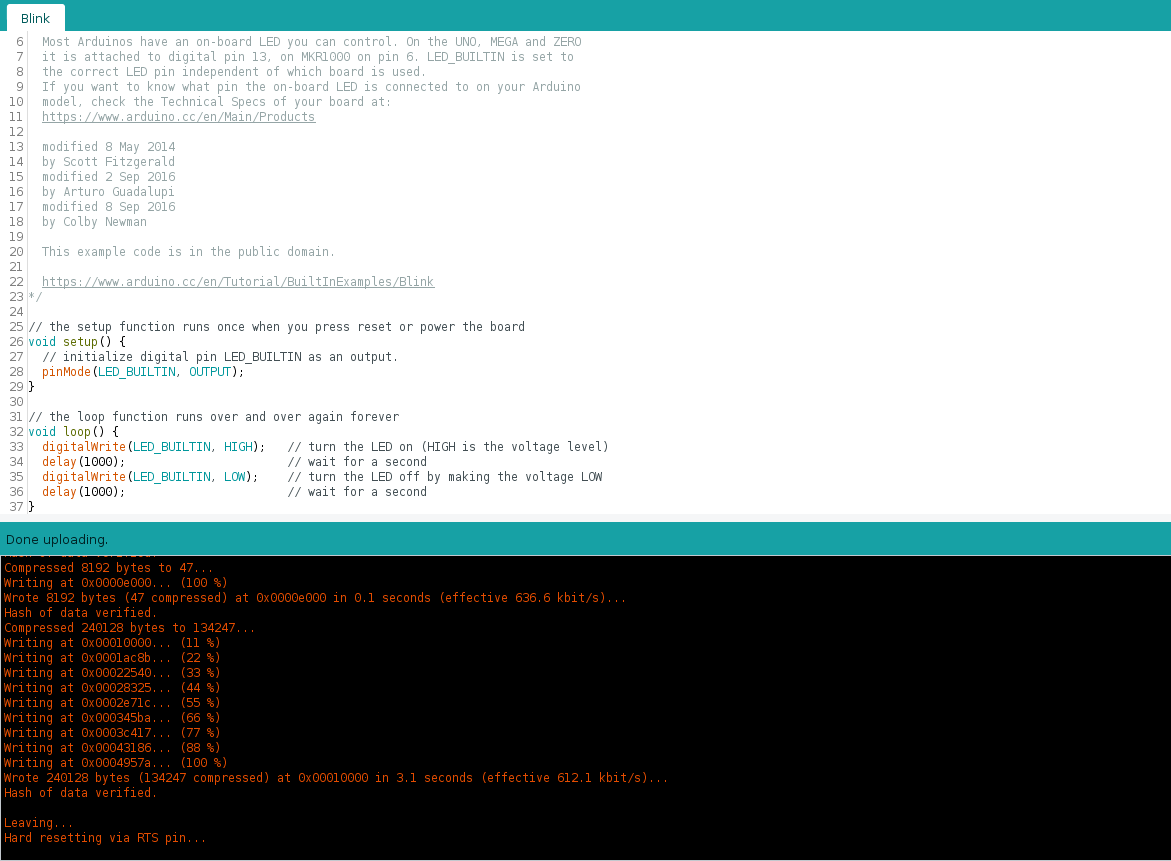
Next press Build or Upload button, it should just work (RGB LED will blik white with blinky example)
### Platformio IDE
After installing [Plarformio IDE](https://platformio.org/platformio-ide), open sample [arduino project](/firmware/esp32c3-blink). Run `Build` command to install necessary tools and libraries.
Next run `Upload: esp32-dev-board` task to start upload over USB. `Monitor` task should give you Serial monitor, as long as you have your board connected via USB (Serial port appears right after board boots up).
## Hardware
Board schematic can be found in the [hardware](/hardware) section
| Front | Back |
|---|---|
|  | 
-  ESP32-C3 MCU
-  WS2812B RGB LED
-  Programming and Debug port (USB-C)
-  Hardware Reset button
-  VIN disconnect - cut this line to disconnect LDO chip and power-on LED, recommended for low-power applications
## Where to buy
Available at [Tindie](https://www.tindie.com/products/sonocotta/esp32-c3-development-board)
## Links
- [ESP32-C3 Product Page](https://www.espressif.com/en/products/socs/esp32-c3)